VISI - WORKXPLORE
Native CAD Viewer
WORKXPLORE is the ideal tool for directly displaying and evaluating 3D CAD files without the need for the original CAD application. The intuitive, easy-to-use interface enables novice and experienced users alike to explore any type of 2D/3D CAD file.
WORKXPLORE enables users to build virtual unified prototypes or 3D models from files imported from various CAD applications. Users can work on model set up and improvements before committing time and resources to creating a real prototype.
A wide range of CAD interfaces are available: VISI, Catia V5, Catia V4, Unigraphics, Parasolid, Pro/E, SolidWorks, Solid Edge, Cadds, IGES, STEP, Unisurf, STL (binary and ASCII), VRML, DXF, DWG, HPGL.
WORKXPLORE has been created for the efficient import and analysis of files of all sizes and types but it is the speed at which it imports large 3D CAD files which is particularly impressive, often taking less than half the time to open a file compared to the original CAD application.
The software saves the native CAD data in its own lightweight format enabling users to calculate surface areas and volumes, measure thickness, dimensions and angles and much more without requiring the original CAD data. This lightweight format can be easily transmitted to other project members via email.
Click here to request a trial
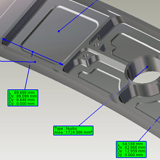
Measurements : WORKXPLORE features a wide range of 2D and 3D measurement functions that are highly accurate due to the high precision B-rep 3D model employed.
Even non-expert CAD users can quickly get to grips with the software’s measurement functions and obtain good results instantly by using the software’s predefined selection modes (points, 2D entities, planes, surfaces, etc).
Measurements can be automatically included as measurement entities and can be anchored to characteristic points of the part. Entity labels automatically pivot to remain visible at all times.
WORKXPLORE’s specialist measurement functions allow expert CAD users to recover point clusters from three-dimensional measuring equipment or machine probes and to quickly check any data revision against the original CAD geometry. The software also allows users to easily generate control point files for transmission to three-dimensional measuring equipment or NC machines.
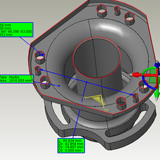
Annotation : WORKXPLORE offers a wide range of annotation functions. Users can convey their ideas, observations, instructions and change requests easily and quickly.
The need for 2D drawings is minimized as users can directly add dimensional and geometric measurements, annotations and labels to the 3D model.
Analyse : WORKXPLORE comes with a full range of specialist analysis tools which can be used to help make quotes, diagnostics, assembly notes or for 3D models production preparation.
WORKXPLORE also offers a range of analysis functions which are usually only available with more costly CAD solutions. As well as being extremely fast and efficient (even on very large models), the software’s functions are very easy to use with results being displayed in colour on the 3D model. In a single mouse click, labels are automatically inserted on surfaces displaying accurate values resulting from various calculations.
High performance dynamic sectioning allows users to explore inside a part or an assembly easily and accurately. The dynamic reference controller allows users to control the section plane with the mouse in rotational and panning directions or following a guide curve. The cross section can be made visible on the 3D model or as an isolated entity and can be extracted and exported via the DXF, DWG, etc interfaces.
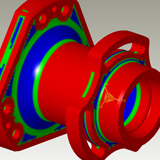
Curvature radius and plane face analysis is a valuable tool for users enabling fast cost and production time evaluation. The colouring of elements to be analyzed is automatic and users can insert measurement labels containing precise values of the elements selected.
Generation of the bounding box of a part or a set of parts is instantaneous and provides information on the dimensions, volume and weight of the selected elements. This can also be used to determine the optimal stock model required for manufacturing.
Precise measurement information is available both on objects and surfaces and enables rapid calculation of volumes and areas. Complementary information such as the object name, encumbrance, number of faces, etc. is also available.
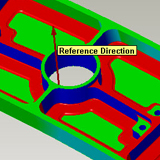
The calculation and display of drafts and undercuts are extremely quick, even on very big parts. WORKXPLORE automatically colours drafts and undercuts according to the mold stripping axis. Precise draft angle values are displayed dynamically as the mouse is dragged over the surfaces and can be inserted by default in the 3D model.
Automatic 3D part comparison allows real time 3D graphic display of the differences between two versions. Modifications are clearly identified by different colours to distinguish between material added and material removed.
Amimation : WORKXPLORE includes a fully functional animation kernel allowing users to generate exploded views or animated assembly movements. Setting up animations is achieved by simply initiating basic movements such as translation, rotation or following a guide curve.
Interference Detection : Dynamic collision analysis functions can be used during animations to carry out real time control of mechanism interoperability or process control.
Users can also generate short videos directly from the animation menu that can then be shown to customers or other project members.


